Installing a storm door is a valuable addition to your home, providing an extra layer of protection against the elements and enhancing energy efficiency.
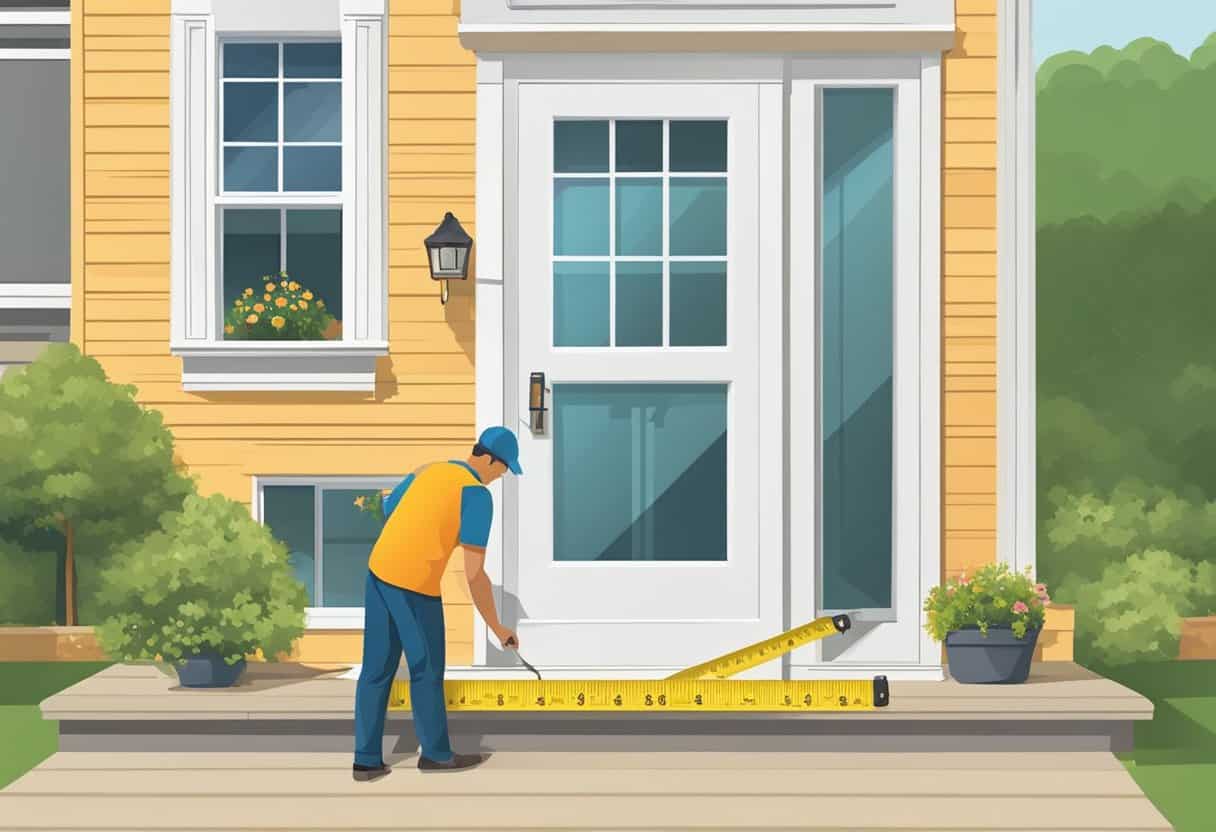
To start, it’s crucial to choose a storm door that complements the style and color of your existing entry door while also fitting the door’s measurements accurately. Before purchasing a storm door, you must measure your doorway meticulously to ensure a proper fit. The width and height of the door frame must be measured from different points, as slight variances can make a significant difference in installation.
Selecting the right storm door involves understanding the types of storm doors available, including full-view, ventilating, and retractable screen varieties, each providing unique benefits and features. After selecting the best storm door for your needs, preparing for installation includes gathering the necessary tools and reading through the manufacturer’s instructions thoroughly.
While the installation process is straightforward, a careful approach to attaching and aligning the door ensures it operates smoothly and seals properly. Moreover, adjustments may be needed after installation to achieve the perfect fit and closure.
To install a storm door, measure the doorway’s width and height, select the suitable door, and ensure it opens correctly. Attach the hinge rail, then the door, ensuring levelness. Install the drip cap, latch rail, and handle, making adjustments for smooth operation. Regular maintenance is key.
Determining the Right Storm Door
Before choosing a storm door, it’s crucial to consider the model that suits your needs, the correct door swing direction, and the importance of precise measurements.
Choosing the Appropriate Storm Door Model
When selecting a storm door, consider factors like security and energy efficiency. Storm doors come in various materials such as aluminum, vinyl, or wood, each providing different levels of durability and insulation. Doors with glass panels can increase natural light, while those with a screen door option offer ventilation in warmer months. Standard storm door sizes are commonly available, but for non-standard entryways, you may need to opt for custom storm doors.
Identifying Door Swing Direction
Determining the swing direction of your door is essential when installing a storm door. Stand outside your home facing the door; if the hinges are on the right, you need a right-handed storm door, and if they’re on the left, a left-handed one is necessary. This is known as the handedness of the door and will affect the type of storm door you choose.
Understanding the Significance of Proper Measurement
Accurate measurements are critical to ensure your storm door fits perfectly. Measure the height and width of your door opening in three places: top, middle, and bottom for width, and left, center, and right for height. Use the smallest measure for the width and height to guarantee a snug fit. Equip yourself with a tape measure and pencil to record these dimensions accurately. Getting this step right saves you time and ensures a secure installation.
Preparing for Installation
Before embarking on the storm door installation process, ensure that you have all the necessary tools and materials and that your measurements are precise. Accurate measurements and the correct tools will streamline the installation.
Gathering Necessary Tools and Materials
To successfully install your storm door, compile the following items:
- Power Drill: for making pilot holes and securing screws.
- Hacksaw/Hand Saw: for trimming the door or frame as needed.
- Screwdriver Set: for manual screw tightening and adjustments.
- Hammer: for nail adjustments or removals.
- Pencil: for marking measurements and cut lines.
- Measuring Tape/Tape Measure: essential for accurate measuring.
- Level: to ensure the door is perfectly horizontal.
- Plumb: to verify vertical alignment.
Remember to also have the following materials:
- Nails and Screws: appropriate for attaching hinges and hardware.
- Exterior Door Hinges: to attach the storm door to the frame.
- Door Handle Set: which typically includes lock and lever.
- Weather Stripping: to seal gaps and improve insulation.
Ensuring Accuracy with Measuring Tools
Your storm door’s fit and performance hinge on accuracy in measurement. Here is how to measure effectively:
- Use your tape measure to determine the dimensions of the existing door frame.
- Check the width at the top, middle, and bottom, then record the smallest measurement to ensure a fit.
- Measure the height from the sill to the underside of the exterior trim at both sides, using the smallest measurement.
- Employ the level and plumb to check the door frame for squareness. Any significant deviations may require adjustments to the frame or door.
Removing the Existing Door and Hardware
Carefully remove the existing door before proceeding with the storm door installation:
- Start by removing the hinges using your screwdriver or power drill.
- If the door is stuck, gently tap with a hammer to loosen the pins.
- Next, take off the door handle and any weather stripping that’s attached to the door frame.
A correctly prepared area will lead to a smoother installation of your new storm door.
Measuring Your Doorway
Before you begin the journey of installing a new storm door, acquiring precise measurements of your current doorway is crucial. This ensures that you select the correct size for optimal performance and aesthetics.
Taking Accurate Width and Height Measurements
To determine the width and height of your doorway, use a tape measure. Measure the width of the door opening in three places: the top, middle, and bottom. Record the smallest of these measurements as your opening width. This is because your house may have settled over time causing slight variations. For the height, measure from the sill to the underside of the door trim at the top. If there is a variance, use the shortest measurement. Keep in mind that standard storm door sizes are 80 or 81 inches in height, and width can vary from 30 to 36 inches. If your door is outside these measurements, you may need a custom door.
Width Measurements:
- Top: ________
- Middle: ________
- Bottom: ________
- Use narrowest width
Height Measurements:
- Left: ________
- Center: ________
- Right: ________
- Use shortest height
Accounting for the Door Jamb and Entryway Specifics
Consider the specifics of the door jamb and the surrounding entryway, as these affect how the storm door will fit. On the hinge side, you must leave enough room for the storm door’s hinges to operate without obstruction. Pay attention to the existing door’s threshold and any brick mold or trim that frames the exterior of the doorway. Mark with a pencil where adjustments or trimmings might be necessary.
- Door Jamb Measurement: Check the space allotted for the threshold and hinge side clearance.
- Brick Mold and Trim: Ensure there is no interference with existing structures.
Verifying Level and Plumb of Door Opening
Use a level to verify that the sides (jamb) of the door opening are plumb, and the top threshold is level. If these are not perfectly upright and level, the storm door may not close properly, leading to potential security issues or weather infiltration. These measurements are critical to ensure the door operates as intended for both function and security.
- Level: Check across the top threshold.
- Plumb: Verify the sides of the door opening with a carpenter’s level.
Selecting and Prepping the Storm Door
Before you select and prepare the storm door for your home, it’s essential to consider the specific components that will ensure a perfect fit and function, such as the type of hinge, handle, and door closer.
Customizing the Storm Door for Your Entryway
To customize your storm door, begin by accurately measuring the width and height of your door opening. This step is crucial because it determines the size of the storm door you’ll need. Storm doors typically come in standard sizes, but if your entryway has unique dimensions, you may require an extender kit to ensure a snug fit.
Next, identify the hinge side of your door. This will dictate whether you need a left or right-hand storm door. Ensure that the storm door’s hinges are on the same side as your entry door’s hinges.
Select a storm door with the design and features that suit your needs—options for the handle, lock, latch, and even the style of glass can vary.
Consider the z-bars, which are metal strips that frame the sides of the door. The handle-side z-bar and hinge-side z-bar should be trimmed to match the height of your door opening. If your door requires a tighter seal against weather, a drip cap at the top and a door sweep or an expander sweep at the bottom can be fitted.
For doors that don’t line up with the existing frame, a furring strip may be added to create an aligned surface for the z-bars. Additionally, the door closer should be selected based on the weight of your storm door to ensure it closes smoothly and seals properly.
By paying attention to these details, you can be sure your storm door will be a perfect addition to your entryway, both in style and functionality.
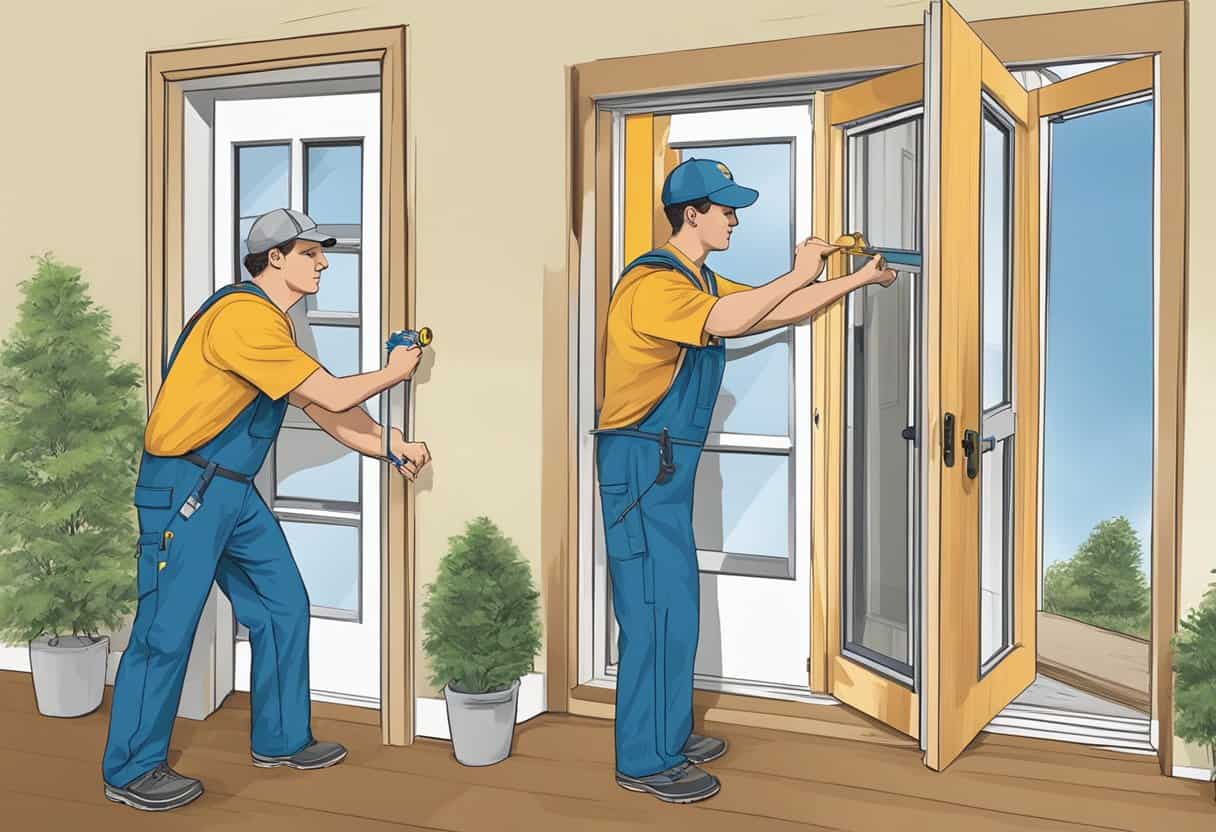
Installing the Storm Door
Installing a storm door provides an additional layer of protection and energy efficiency for your home. Before beginning, ensure you have the correct measurements and all necessary tools at hand.
Attaching Hinges and Z-bars
1. Secure the Hinges:
First, align the hinges with the pre-drilled holes on the storm door. It’s critical to ensure that the door’s height matches the door opening. Start by attaching the hinge-side Z-bar to the door’s hinge side, using screws. Make certain the top of the Z-bar is flush with the top of the door.
- Tools Required: Screwdriver or drill, level, tape measure
- Materials Needed: Hinges, screws
2. Install the Hinge-Side Z-bar:
After securing the hinges, you should attach the hinge-side Z-bar to the door frame. The Z-bar may need to be trimmed to fit the height of your door opening correctly; a hacksaw can be used for this purpose. Ensure the Z-bar is vertical and level before permanently fastening it with screws.
- Measure Twice: Check the level of the Z-bar against the door frame to prevent any issues with the door’s operation.
3. Aligning the Door:
Carefully lift the door and position it in the door frame, aligning the installed hinges with the hinge-side Z-bar. Insert the hinge pins or screws to attach the door to the frame.
4. Fixing the Latch-Side:
Move to the latch-side of the door and attach the latch-side Z-bar, similar to the hinge-side. Ensure the door closes properly and makes a snug fit with the latch-side Z-bar.
- Adjust if Needed: If the door isn’t closing smoothly, adjust the position of the Z-bar and check for plumb using the level.
By following these steps, your storm door installation should be successful. Remember to take your time when measuring and aligning, as precision is key to a properly functioning door.
Finalizing Installation and Adjustments
Once the storm door is hung, it’s critical to ensure that locking mechanisms and door closers are properly installed for security and functionality.
Securing Lock, Handle, and Door Closers
Lock and Handle Set Installation:
- Align the handle set with the pre-drilled holes in the door.
- Fasten the exterior and interior parts of the handle together using the provided screws.
- Ensure the fit is snug to prevent wobbling or instability.
Proper Latch Function:
- Test the latch by closing the door and observing if it catches securely. If the latch is misaligned:
- Loosen the screws slightly.
- Adjust the position for a perfect fit.
- Retighten the screws once proper alignment is achieved.
Door Closer Installation:
- Attach the bracket of the door closer to the door’s top frame.
- Connect the other end of the door closer to the door itself using the second bracket supplied.
- Inspect the movement and adjust the tension to ensure the door closes smoothly and seals properly against the weatherstrip.
Weatherstrip and Insulation Check:
- With the door closed, check all around the door for even contact with the weatherstrip.
- Adjust the door closer or hinges if there are gaps to maintain a tight fit and improve insulation.
Post-Installation Tips
After you’ve installed your storm door, it’s important to ensure that it provides the optimal protection and insulation for your home. Now let’s move on to verifying the effectiveness of the weatherproofing and insulation of your newly installed door.
Checking for Weatherproofing and Insulation
Weatherproofing: Once the installation is complete, check the perimeter of the door to ensure that the weatherstripping is intact. The weatherstripping should seal tightly with no visible gaps. You can test this by slowly running your hand around the edges to feel for any drafts. If any areas seem to be letting air through, additional weatherstripping or caulking may be necessary.
Insulation: Assess the insulation, ensuring there’s no pathway for heat to escape or cold to enter. This not only keeps your home more comfortable in varying weather conditions but also contributes to energy efficiency. For a DIY project, this might involve inspecting the door’s corners and where it meets the door frame; sometimes, expanding foam insulation is used to fill in any voids.
Professional Advice: If you’re unsure about the installation or how to check for weatherproofing and insulation, it may be valuable to seek advice from a professional storm door installation expert. Regular maintenance is key, especially in harsh weather, to sustain the longevity of your storm door.
Your role as a homeowner is to ensure that the door remains in excellent condition, contributing to the overall insulation of your home. If this was a DIY project, be proud of your accomplishment, but also remain vigilant to your storm door’s performance and address any maintenance needs promptly.
Seasonal and Maintenance Considerations
When installing a storm door, it’s important to account for the seasonal shifts that affect how you’ll use and maintain your door. To ensure it functions effectively, you’ll need to transition between its configurations for summer and winter and keep up with regular maintenance.
Transitioning Between Summer and Winter Modes
Summer Mode: During the warmer months, your storm door should maximize ventilating while still providing security. If your door has interchangeable glass panels and screen inserts, swap the glass panels out for the screen version to enhance airflow. Ensure that the weatherstrip is intact and prepare for sudden summer storms by securing the door in its frame.
Winter Mode: As the weather cools down, replace the screen inserts with glass panels to help maintain energy efficiency and keep cold drafts at bay. Check and, if necessary, replace any worn weatherstrip to prevent heat loss. This transition typically occurs in late fall before the first frost sets in and again in spring as the temperatures start to rise.
Regular Maintenance for Long-Term Efficiency
To extend the lifespan of your storm door and ensure it remains effective, regular maintenance is key. Inspect the door at least twice a year for signs of wear or damage. Look closely at the:
- Hinges and Latch: Make sure they’re securely fastened and lubricate as needed for smooth operation.
- Weatherstrip: Check for any peeling or cracking, and replace it to prevent drafts and improve insulation.
- Glass and Screen: Clean both the glass panels and the screen door with appropriate cleaners to maintain visibility and airflow.
Be proactive; addressing small issues promptly can prevent them from becoming serious problems. Remember, taking care of your storm door not only improves home security but also contributes to overall energy efficiency throughout the changing seasons.
Frequently Asked Questions
This section covers the essentials on measuring and fitting a storm door to your home.
What are the necessary measurements to take before purchasing a storm door?
Before purchasing a storm door, you need to measure the width and height of the existing door opening in three places: the left, middle, and right for width; and top, middle, and bottom for height. Use the smallest measurements to ensure a proper fit.
How do you determine the correct size storm door for a given opening?
To determine the correct size storm door, use the narrowest width and shortest height measurement. Storm doors often come in standard sizes, so select the one closest to your measurements, without going over.
What is the standard procedure for installing a new storm door?
The standard procedure for installing a new storm door involves securing the hinge-side z-bar with screws, then attaching the door to the frame, ensuring it swings freely. Lastly, install the hardware and make any necessary adjustments for smooth operation.
Are there specific tips for measuring an existing door when considering a storm door replacement?
When measuring an existing door for replacement, check the door trim to ensure it is flat and can support a storm door. If it’s not, additional preparation may be required before installation.
What are the guidelines for assessing the rough opening for a storm door installation?
For assessing the rough opening, ensure the opening is about 1/4 to 1/2 inch wider and 1/4 to 1/2 inch taller than the storm door you plan to install. This will allow for a good fit while accommodating for any necessary adjustments.
How can you adjust a storm door to fit a non-standard door opening?
To adjust a storm door for a non-standard opening, you may need an extender kit or use a jamb to fill the gap. In cases where the size discrepancy is minor, you might need to trim the storm door flange for a proper fit.