Are you ready to capture the mesmerizing beauty of the night sky through astrophotography?
Astrophotography, the specialized art of photographing celestial bodies, offers a unique blend of technical challenge and creative expression. For those eager to embark on this celestial journey, the right equipment is not just helpful – it’s essential. But with so many options available, how do you choose the gear that will best suit your needs?
Well, we’ll be going over:
- What are the fundamental pieces of equipment required for astrophotography, and why are they critical?
- How does one choose the right camera and telescope, balancing factors like sensor size, aperture, and focal length?
- What additional accessories should an astrophotographer consider to enhance their night sky photography experience?
Join us as we explore the essential tools and tips for capturing the night sky in all its glory.
Let’s dive in.
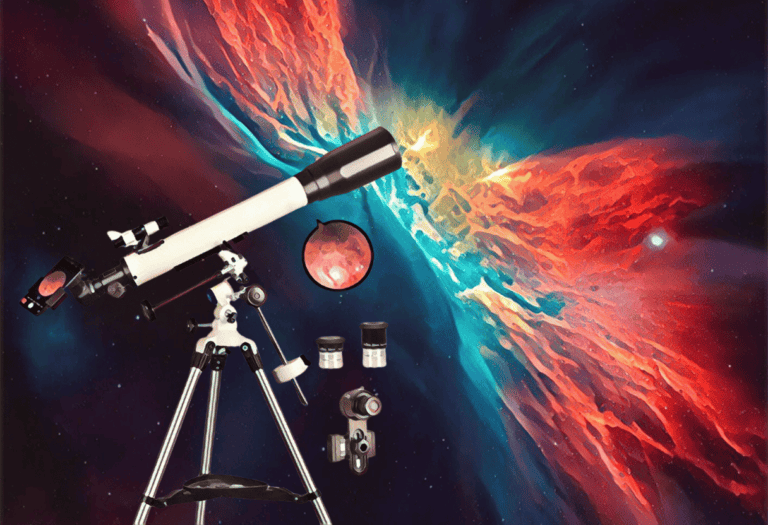
Top Picks for Astrophotography Gear
- Astromania Compact Guide Scope – Top Pick
- Alstar 70mm Guidescope Kit
- DSLR Astrophotography Guide
- JJC Tripod Stone Bag
- KIWIFOTOS Lens Heater
Astrophotography combines the intricate art of photography with the vast and timeless beauty of the night sky. I’ve scoured the market and tested various gadgets to help you capture the cosmos with the sharpest clarity and detail. Whether you’re a seasoned stargazer or a beginning shutterbug, my selection caters to a range of expertise and budget. Rest assured, each piece of equipment has been evaluated on performance, durability, and user-friendliness to enhance your celestial shooting experience.
Astromania Compact Guide Scope

For those venturing into astrophotography, the Astromania Compact Guide Scope is a dependable addition to your setup, ensuring quick star finding and stable guiding.
Pros
Cons
Having recently had my hands on the Astromania Compact Guide Scope, I can assert its solid construction is immediately apparent. The black anodized aluminum feels robust and looks like it can endure numerous nights under the stars without any wear.
The true gem of this device, I’ve found, is the double helical focuser. It operates smoothly, allowing me to achieve sharp focus without hassle, which is key in astrophotography for pinpointing guide stars. Swift focusing also means less fiddling in the dark, translating into more observation time.
However, attaching it to my telescope was slightly fiddly at first. Once I got the hang of securing the dovetail bracket, it was smooth sailing. The only other slight annoyance was the silicone lens cap. It doesn’t stay on as snugly as I would like, something to keep in mind when stowing the guidescope.
Overall, my experience with the Astromania Guide Scope was positive. Its solid performance out in the field made it a valuable tool for my astrophotography endeavors. Despite a couple of minor inconveniences, its benefits far outweigh them, especially when it comes to finding and guiding stars with ease.
Alstar 70mm Guidescope Kit

I’d recommend this guidescope to anyone who needs a solid, no-fuss guide for astrophotography; its ease of use makes it a valuable addition to your gear.
Pros
Cons
Having recently had the chance to use the Alstar 70mm guidescope, I found that it slots into my astrophotography setup with minimal fuss. The all-metal construction speaks volumes about its durability, which is a big plus for anyone who spends countless nights under the stars. The ease of quickly finding guide stars with its bright, wide-field optics significantly reduces setup time, allowing me to focus more on capturing the perfect shot.
Focusing is precise and smooth, thanks to the built-in worm-focuser with a brass compression ring. As someone who values sharp focus in astrophotography, I appreciate the inclusion of the micro-focusing Helical focuser. It adds a level of fine-tuning that I don’t get with every guidescope. Transitioning the guide scope between different eyepieces is effortless and secure, which is a testament to Alstar’s thoughtful design.
Portability is crucial for my gear, and although the Alstar guidescope is relatively compact, its weight is something to consider, especially when attached to smaller telescopes. The stellar build comes at the price of heft, but it’s a worthy trade-off when considering the added stability and quality. Some users, including myself, might seek even crisper imagery, but overall, the optical performance is competent for both visual and photographic tasks.
A deeper pool of customer feedback would be beneficial for assessing the long-term performance of this guide scope, but from my experience, it’s off to a strong start. It’s worth noting that it operates seamlessly with my existing equipment, and the adjustable-aim dovetail guide scope bracket proved to be a universal fit—another aspect that simplifies the astrophotographer’s life.
Overall, the Alstar 70mm guidescope is a reliable and user-friendly option that should satisfy most amateur astrophotographers looking for a balance between performance and ease of handling.
DSLR Astrophotography Guide

After diving into this guide, I’m convinced it’s a must-have for anyone serious about DSLR astrophotography.
Pros
Cons
I had the chance to spend some quality time with “Digital SLR Astrophotography” over the weekend, and as someone who breathes astrophotography, I found it enlightening. The guide makes it clear that mastering the art requires understanding both your equipment and the night sky—a concept I wholeheartedly agree with.
The author, Michael Covington, does an adept job at breaking down formidable technical jargons into bite-sized pieces. His approach helped me assimilate the intricacies of DSLR astrophotography much more effectively and reminded me of my initial forays into the stargazing world.
Relating it back to my recent attempts to capture the Orion Nebula, Covington’s discussions on exposure and composition clarified why some of my previous shots didn’t turn out as expected. The troubleshooting tips provided are practical and actionable—something I appreciate when I’m out in the field.
This guide isn’t just a read; it’s more of a companion for your astrophotography journey. Whether you’re starting out or have been at it for a while, the insights offered here can turn mere fascination into tangible results you can see in your photos.
JJC Tripod Stone Bag

I just tested the JJC Tripod Stone Bag on my latest night sky shoot, and it’s a game-changer for anyone needing a sturdy, reliable support for their equipment.
Pros
Cons
Having used the JJC Tripod Stone Bag under a sky full of stars, I can confidently say it’s a robust enhancement to any astronomy setup. Its design is straightforward yet efficient, allowing for quick and secure attachment to the tripod legs. Out in the field, the added stability it offers is immediately noticeable, especially on those breezier nights when you’re aiming for the perfect long-exposure shot of the Milky Way.
The organization it provides is a bonus. With dedicated medium and small pockets, I had quick access to different lenses and filters without fumbling around in the dark. However, some might find the Velcro less than totally reassuring with precious lenses inside, although I had no issues.
While this stone bag is particularly useful, it’s not made to hold extremely heavy weights, which could be a downside for some. Larger tripods used in astrophotography can often require significant counterbalance, and while the JJC bag holds its own, there’s certainly a limit to its 20 kg capacity.
Overall, the JJC Tripod Stone Bag is a solid companion for the astrophotography hobbyist or professional looking for a little extra stability and accessibility in the field. Its ease of use and practical design make it an item I won’t be leaving behind on future nighttime photography adventures.
KIWIFOTOS Lens Heater

If you’re out in the cold capturing the night sky, this lens heater could be your best companion to prevent lens fogging.
Pros
Cons
Having tested the KIWIFOTOS Lens Heater on a chilly night, I appreciated how it seamlessly kept my telescope lens dew-free. The adjustable temperature control with high, medium, and low settings allowed me to tailor the heat exactly as needed, adapting well to the plummeting temperatures that can wreak havoc on a night of astrophotography.
During the frosty evenings, it’s not just about keeping the lens clear, but also ensuring functionality without adding bulk or complexity to the setup. The USB power supply of this lens heater is a clear winner, offering the flexibility to connect to a portable power bank, which means my photography session remains unchained from fixed power sources.
What adds to the appeal is the quick installation process. I could adjust the heater to fit my various lenses under 80mm in diameter hassle-free, which speaks to its versatility—a major plus for anyone with multiple lenses in their kit.
Despite its overall utility, if there’s one aspect that could be marginally better, it would be the length of the heating element. I made sure to position it strategically to cover the most critical parts of my lens. Also, initially, getting the device running took some getting used to; the power button’s responsiveness could be more intuitive.
My tools play a pivotal role in my astrophotography adventures, and the KIWIFOTOS Lens Heater has earned its place in my gear bag. It’s a robust accessory that delivers on its promise of keeping the lens clear for capturing the cosmos, even when the mercury drops.
Buying Guide
Setting Your Budget
Before selecting astrophotography equipment, it’s important to determine your budget. High-quality astrophotography can be expensive, but there are options available at various price points. Establish how much you’re willing to invest in this hobby before proceeding.
Camera Considerations
When it comes to cameras, sensor size and sensitivity are paramount. I recommend choosing a camera with a large sensor and high ISO capabilities for better light collection. A camera with a low noise profile at high ISO settings will significantly improve the quality of night sky images.
Telescope and Mounts
Regarding telescopes, aperture size and focal length matter. A larger aperture collects more light, making distant objects more visible. However, for wide-field astrophotography, a shorter focal length may be more suitable. The mount is another critical component; a sturdy equatorial mount with precise tracking ability can greatly enhance long-exposure imaging.
| Feature | Importance for Astrophotography |
|---|---|
| Camera Sensor Size | High |
| ISO Performance | High |
| Telescope Aperture | High for deep-sky |
| Focal Length | Variable (task-dependent) |
| Mount Stability | Essential |
| Tracking Accuracy | Essential |
Lenses and Filters
For camera lenses, look at the focal length and maximum aperture. A fast lens (with a wide maximum aperture) is beneficial for astrophotography, allowing shorter exposure times. Filters can also be helpful to reduce light pollution or enhance contrast for specific celestial objects.
Accessories
Lastly, consider additional accessories like remote shutters to reduce vibrations, power supplies for extended shooting, and dew heaters to prevent lens fogging. A well-thought-out set of accessories can make a significant difference in your astrophotography experience.
Remember, it’s not just about the equipment; understanding how to use these tools effectively is crucial. Take the time to research and practice to make the most out of your astrophotography gear.
Frequently Asked Questions
In this section, I’ll answer common questions regarding the essentials of astrophotography equipment.
What are the essential pieces of equipment for a beginner in astrophotography?
For beginners, a sturdy tripod, a DSLR or CCD camera capable of long exposures, and a wide-angle lens are essential. Adding a remote shutter release can also help prevent camera shake during long exposures.
Which telescopes are recommended for quality astrophotography?
Refractor telescopes with apochromatic (APO) lenses are highly recommended due to their ability to reduce chromatic aberration. For deep-sky photography, Schmidt-Cassegrain telescopes are also popular for their versatility and compactness.
How can I choose the best camera for capturing deep sky objects?
Select a camera with a large sensor and high sensitivity (low noise) to light, like a cooled CCD or CMOS astro-camera. High dynamic range and the ability to take long exposures without overheating are also critical for capturing deep sky objects.
What factors should be considered when purchasing astrophotography equipment?
Consider the type of astrophotography you’re interested in, the weight and portability of the equipment, the camera’s sensor size and pixel scale, mount stability, and whether the gear suits long exposure imaging. Compatibility with other equipment and future upgrades should also be taken into account.
Can you suggest a basic setup for someone starting in astrophotography?
A basic setup can include an entry-level DSLR, a solid tripod, a wide-field refractor telescope, and a reliable equatorial mount. Additionally, consider a field flattener for better image quality and a guide scope for longer focal length imaging.
What are the cost considerations for setting up an astrophotography hobby?
Initial costs can vary widely, from a few hundred to several thousand dollars. Budget for the main components like the camera, telescope, and mount, but also reserve funds for accessories, software for image processing, and potentially travel to dark-sky locations.