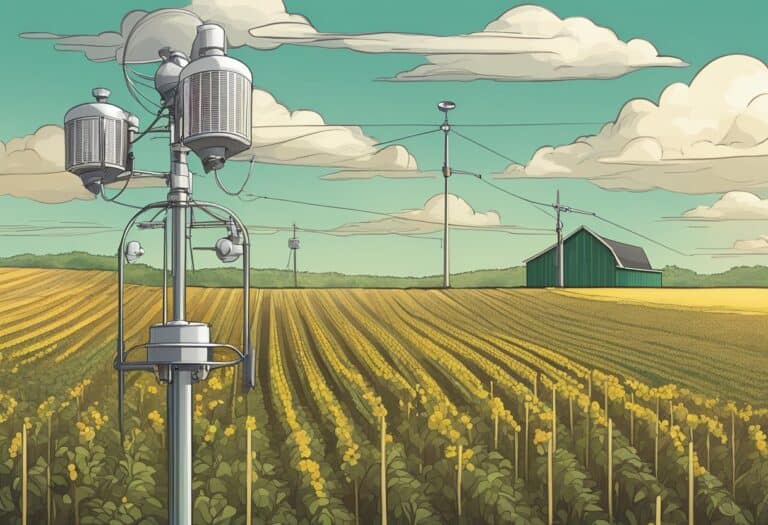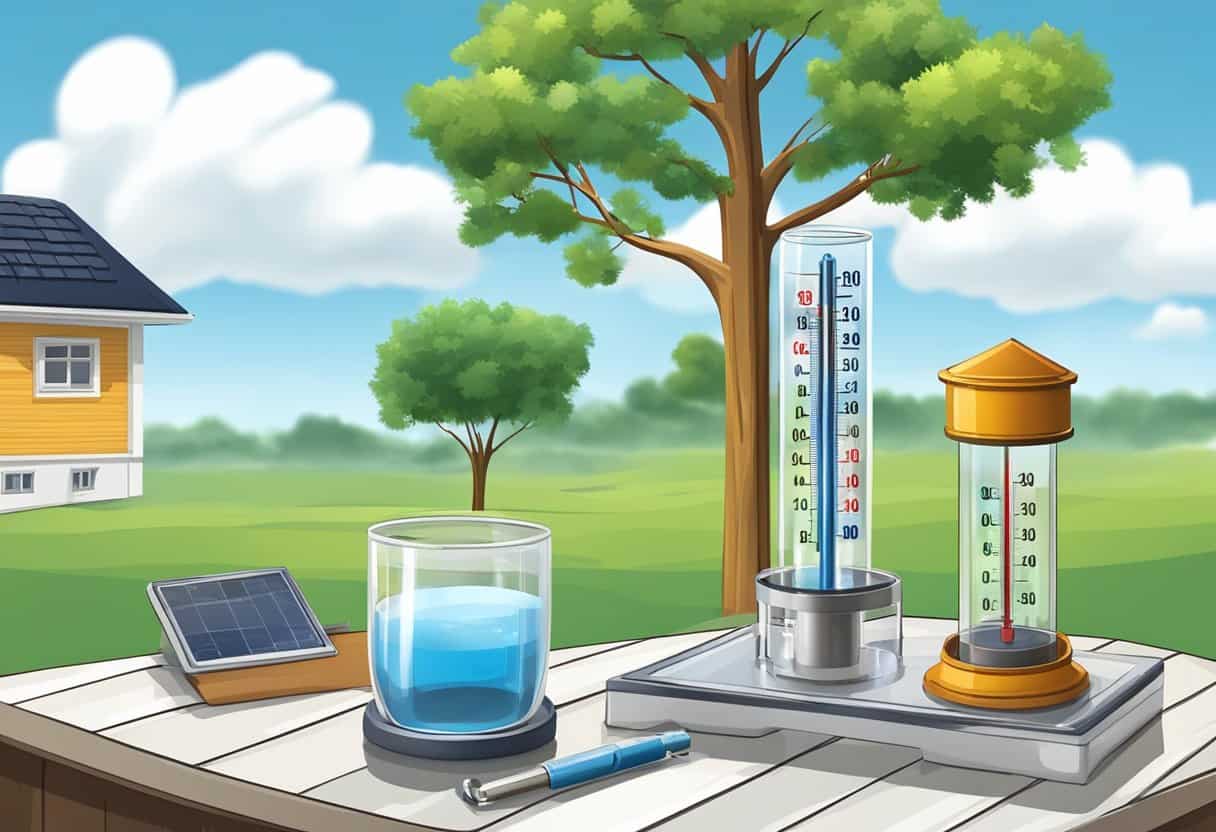
Building your own simple weather station can be a rewarding DIY project that offers a hands-on way to engage with meteorology.
By assembling a set of basic sensors and instruments, you’ll gain insights into the weather patterns and microclimate around your home or garden. This project involves selecting the right tools and materials, setting up the sensors for accurate readings, and learning how to maintain your setup for long-term reliability.
Once your weather station is operational, you’ll start collecting valuable data on temperature, humidity, atmospheric pressure, and perhaps even wind speed and rainfall. The challenge lies not just in gathering this information but also in storing, interpreting, and utilizing it to make weather predictions or for educational purposes.
With the information your station provides, you can develop a deeper understanding of the local climate and contribute to larger citizen science initiatives.
To build a simple weather station, gather sensors for temperature, humidity, wind, and rain. Connect them to an Arduino or Raspberry Pi for data processing. Install the station in a clear area, away from obstructions. Regularly maintain and calibrate the sensors for accurate readings. Use online platforms to share data and insights.
Understanding Weather Stations
A weather station is a pivotal tool in meteorology, collecting a variety of important weather-related data. This information is essential for forecasting and studying weather patterns.
Primary Functions
Weather stations have several core functions that are crucial for collecting weather data. At the heart of operations, they:
- Measure temperature: This indicates the warmth or coldness of the atmosphere and is foundational in weather prediction.
- Record wind speed and direction: Understanding wind patterns can help predict weather changes and is vital for various sectors including aviation and marine navigation.
- Gauge rainfall: By measuring precipitation, you can obtain data for predicting floods and for agricultural planning.
- Monitor atmospheric pressure: Variations in atmospheric pressure often precede changes in the weather, making this measurement key for forecasts.
- Determine humidity levels: Humidity impacts comfort, weather development, and can affect many industrial processes.
Key Weather Parameters
To accurately forecast and study weather, these parameters are measured:
- Temperature: Essential for meteorological studies and daily weather forecasts.
- Wind: Speed and direction data are used to understand and predict weather systems.
- Rain: Rain gauges capture the amount of rainfall, important in climate studies and water resource management.
- Pressure: Barometric readings of atmospheric pressure provide insights into impending weather changes.
- Humidity: Hygrometers capture humidity, influencing weather predictions and climate studies.
By monitoring these elements, your weather station becomes a powerful tool to discern patterns and contribute to the science of meteorology.
Tools and Materials Required
To build a simple weather station, selecting the right materials and having the necessary tools at hand are crucial to ensure a successful DIY project. Your attention to detail here will set the foundation for your weather station’s reliability.
Choosing the Right Materials
When choosing materials for your weather station, consider durability and weather resistance. For the main components, you’ll need an Arduino board, which acts as the brain of your station. Your sensors will require a proper enclosure to protect them from environmental factors; this can be made from materials such as acrylic or PVC. It’s essential to ensure your battery is capable of powering the device for a reasonable timeframe, and it should be rechargeable for sustainability.
- Materials List:
- Arduino board
- Weather-resistant enclosure
- Sensors (Temperature, Humidity, etc.)
- Rechargeable battery
Necessary Tools for Assembly
Assembling your weather station requires a set of basic tools. A soldering iron is fundamental for connecting components securely. You’ll need solder to create these connections, and having a library of suitable code is necessary to program your Arduino. Ensure your toolkit includes common equipment like screwdrivers, wire cutters, and pliers.
- Tools List:
- Soldering iron
- Lead-free solder
- Wire cutters
- Screwdrivers
- Pliers
- Computer (for programming and library management)
Remember, proper usage of these tools is crucial for the durability and functionality of your DIY weather station.
Setting Up the Sensors
In constructing your weather station, precise sensor installation is pivotal for accurate data collection. You’ll want to consider factors like exposure to elements and proper wiring.
Temperature Sensor
Your temperature sensor, such as a DHT11, is sensitive to ambient conditions and should be placed away from direct sunlight to prevent erroneous readings. It’s imperative to house the DHT11 inside a radiation shield while ensuring that it has adequate airflow. Use pin headers for easy connection to an Arduino board.
Wind Speed and Direction
For the anemometer and wind vane, find a clear, unobstructed location. Typically, these should be mounted at least 33 feet above ground level to measure wind speed and direction effectively. Secure the installation so the sensors freely move with the wind. They must be connected to the Arduino using appropriate outdoor-rated wiring.
Rainfall Measurement
Install your rain gauge in an open area to accurately measure rainfall without blockages from trees or buildings. It should be firmly mounted and levelled to ensure the collection funnel is unaffected by wind. Regular cleaning to remove debris is also essential for precise measurements.
Air Pressure and Humidity
Place your combination barometer and hygrometer sensor, such as the DHT11, indoors to shield it from the weather while still capturing air pressure and humidity data. The sensor should be connected to an Arduino via a stable circuit on pin headers to ensure reliable performance over time.
When connecting all sensors to your main unit, it’s critical to keep the wiring tidy and protected from the elements, using materials like weatherproof enclosures to prevent moisture ingress. Following these guidelines will enhance the longevity and performance of your DIY weather station.
Data Collection and Storage
When setting up your weather station, the key to effective meteorological assessments lies in how you capture and preserve your weather data. Accurate recordings empower you to track changes and forecast with confidence, whereas efficient storage allows you access to historical data for analysis and comparisons over time.
Recording Weather Data
To record weather data, you need sensors that measure different elements such as temperature, humidity, wind speed, and precipitation. Use a microcontroller like Arduino as the brain of your operation to process these measurements. By incorporating proper code and library functions available for various sensors, you ensure that the data captures are not only precise but also consistent.
Data Logging Methods
Data logging is crucial for storing the data your weather station collects. Two primary methods include:
- Local Storage: Utilizing built-in memory of your microcontroller or connected storage like an EPROM, you can store data which later can be retrieved for analysis. An example seen in the provided search results involves a weather station with the storage capacity for about six months of data at stable intervals.
- Online Storage: For real-time data access and more extensive storage capabilities, upload the data to the internet. This method often involves sending your measurements to a personal website or a cloud-based platform, enabling you to view and manage your data from anywhere.
By combining reliable data collection with efficient storage methods, your weather station becomes a robust tool for personal or community meteorological projects.
Interpreting and Utilizing Data
When setting up your personal weather station, the data you collect is only as valuable as your ability to interpret and use it. Making sense of this information allows you to spot trends, make predictions, and understand the science behind meteorology.
Analyzing Weather Patterns
To effectively analyze weather patterns, you’ll want to start with a systematic approach. Begin by logging data such as temperature, humidity, and wind speed regularly. Look for recurring patterns or abrupt changes in this data over time. This can indicate shifts in weather conditions. You might see, for instance, a drop in pressure before a storm, which is a staple observation used by meteorologists. Utilize charts or graphs to visualize this information more clearly; trends are often easier to spot this way.
Here’s a simple format you can follow:
- Temperature: Chart daily highs and lows.
- Humidity: Record percentages to anticipate precipitation.
- Wind Speed and Direction: Note changes to predict weather fronts.
DIY Forecasting Techniques
With reliable data, you can employ DIY forecasting techniques. If your weather station includes an Arduino board, you can use Arduino IDE to write code that analyzes sensor data to predict the weather. Simple algorithms can help you process the temperature and pressure data to forecast upcoming conditions.
For example, a sudden drop in pressure typically indicates that a storm is coming. By tracking such changes, you are essentially creating your own weather report. Remember, practice is key—regular analysis hones your forecasting skills.
By dedicating time to study and understand the data your weather station provides, you become proficient in predicting local weather. This not only enhances your appreciation for the science behind weather patterns but also equips you with the knowledge to make informed decisions based on your local climate.
Maintenance and Troubleshooting
A reliable weather station is crucial for accurate weather monitoring, requiring consistent upkeep and the know-how to address issues swiftly.
Regular Maintenance Procedures
Rain Gauge: You should clear debris and check calibration monthly to ensure accurate precipitation data. Remove obstructions and verify the tipping mechanism is functioning properly.
Anemometer: Keep moving parts lubricated and remove any accumulated dust or dirt. Check and secure any loose fittings to maintain accurate wind readings.
Barometer: Dust the barometer gently and verify pressure readings against local weather services for accuracy.
- Equipment Check: Inspect all cables and connections for wear and replace as needed to prevent data loss or other malfunctions.
Troubleshooting Common Issues
- Data Inconsistencies: Compare readings with local weather reports. Significant deviations may indicate sensor or calibration problems.
- Power Failures: Ensure your weather station’s power source is secure and uninterrupted. Change batteries or inspect solar panels if applicable.
- Signal Interruption: Ensure there is a clear line of sight between sensors and the display unit, and reposition if necessary.
Sensor Errors: Clean and recalibrate sensors if they provide erratic or incorrect data.
By regularly maintaining your DIY weather station and efficiently troubleshooting common issues, you’ll ensure its longevity and the accuracy of the data collected.
Enhancements and Customization
Enhancing and customizing your weather station can significantly improve its functionality and integration with personal projects. You have the flexibility to add advanced features that cater to your specific interests or needs.
Integrating with Personal Projects
You can integrate your weather station into various DIY projects. For instance, you can utilize an Arduino board to collect and process data. With the proper code, the Arduino can communicate with sensors to monitor conditions like temperature, humidity, and wind speed.
- Internet connectivity: Equip your weather station with Wi-Fi capabilities to send data to your personal website or a weather network.
- Circuit enhancement: Modify your circuit design to include components for solar power measurement or UV index sensing.
Adding Advanced Features
To enhance your weather station:
- Enclosure: Customize the enclosure to protect against environmental factors, ensuring a longer lifespan for your sensors.
- Code Optimization: Develop custom code to refine data collection, improving accuracy and efficiency.
- Weather Forecasting: Add a pressure sensor to predict weather changes.
- Data Logging: Implement a data storage solution for historical analysis.
By equipping your weather station with these enhancements, you can turn a simple setup into a multifunctional device that not only measures but also predicts weather patterns, integrating seamlessly with your projects.
Building a Weather Station for Kids
When building a weather station for kids, focus on creating an educational experience that is both safe and enjoyable. To ensure children make the most of the project, use simple materials and provide clear instructions tailored for their learning level.
Simplifying Concepts for Children
Your aim should be to demystify complex meteorological concepts. Begin by explaining the basic elements of weather: temperature, wind, precipitation, and air pressure. For example, use a thermometer to demonstrate how to measure temperature, and explain that air pressure is related to the weather we experience using a simple barometer project.
- Materials Needed:
- Thermometer
- Anemometer kit
- Rain gauge
- Barometric Pressure Sensor (for advanced projects)
- Tools Required:
- Screwdriver
- Scissors
- Tape or glue
Provide children with step-by-step instructions on how to assemble their weather instruments and record observations. Emphasize the significance of regular observation to understand weather patterns.
Safe and Fun Weather Projects
Create projects that are hands-on yet risk-free. For a wind-measuring project, your anemometer kit should be made from lightweight, safe materials like plastic cups and straws. When constructing a rain gauge, opt for a sturdy plastic bottle to ensure it’s durable and secure.
- Simple Weather Station Projects:
- Build a Thermometer Stand: To keep your thermometer in place and provide consistent readings.
- Create a Wind Vane: Using simple materials like cardboard and a pencil to learn about wind direction.
- Assemble a Rain Gauge: Cut a plastic bottle and mark measurements to monitor rainfall.
Each project should encourage kids to explore and enjoy the process of learning about weather. Make sure to highlight that building a weather station is not just an assignment, but a doorway to engaging with the natural world in a meaningful way.
Installation and Setup
When you’re ready to install your simple weather station, first gather your tools and components. You’ll need an Arduino microcontroller, sensors for measuring weather parameters, cables, a power supply, and an enclosure to protect the equipment from the elements.
Choose a Location:
- Avoid direct sunlight to prevent sensor inaccuracies due to solar radiation.
- Find a spot away from obstructions for the wind sensor; at least 4 times the height of any obstruction within a horizontal radius of 100 meters.
Mount the Enclosure:
- Place your enclosure to shield electronics from precipitation and direct sunlight.
Orientation:
- Use a compass to properly orient your weather station for wind direction accuracy.
Install the Sensors:
| Sensor Type | Installation Guidelines |
|---|---|
| Temperature | Install in a ventilated area, shaded from the sun. |
| Humidity | Same as temperature sensor to prevent direct contact with sunlight. |
| Wind | At least 2 meters above the highest obstruction within a 10-meter radius. |
| Rain Gauge | Place in an open area to avoid missed precipitation. |
Connect to Arduino:
- Follow a wiring diagram to connect sensors to your Arduino, ensuring secure connections.
Power up your weather station, and perform a system check to confirm all sensors are functioning correctly. With careful installation and setup, your weather station will provide you with reliable data for your personal weather observations.
Creating an Online Presence
When you’re ready to share your weather data with the world, creating an online presence is essential. It allows you to connect with others, display your findings, and contribute to the broader community interested in weather patterns and forecasting.
Build Your Website: The first step is to create a website that will showcase your weather station project. Platforms such as WordPress, Wix, or Squarespace offer user-friendly interfaces for building websites without deep technical knowledge. Ensure your website includes:
- Home Page: Introduce your project and highlight the purpose of your weather station.
- Data Page: Present your collected weather data in an engaging format—charts, graphs, or tables work well for this.
- Forecast Page: If your station includes forecasting abilities, dedicate a page to share your weather forecasts.
- Blog: Include a blog section where you can post regular updates, insights, or interesting weather patterns you’ve observed.
Share Your Code: If you’ve developed custom code for data analysis or station operation, consider sharing it on platforms like GitHub. It’s a great way to contribute to the community and allow others to learn from your work.
Engage on Social Media: Use platforms like Twitter or Facebook to share quick updates or weather reports. Join groups dedicated to weather enthusiasts to stay current and engaged with trends and discussions.
Ensure Website Accessibility: Your website should be easily navigable, with a clear structure and mobile-friendly design. Pay attention to:
- Fast page loads
- Readable fonts
- Descriptive alt text for images
Remember to keep your content accurate and regularly updated to build a trusted online presence around your weather station project.
Frequently Asked Questions
Building your own weather station can be a rewarding project. Here, you’ll find answers to common inquiries about creating a simple yet functional weather setup.
What are the essential components required to build a DIY weather station?
To build a DIY weather station, at a minimum, you’ll need sensors for temperature, humidity, and barometric pressure. You might also consider including wind speed and direction anemometers, as well as a rain gauge for precipitation measurement.
How can I create a weather station using a Raspberry Pi?
With a Raspberry Pi, you can create a weather station by attaching the necessary sensors and writing or deploying software to read and record the data. You’ll need to ensure your Pi can communicate with the sensors, possibly using GPIO pins or a USB connection.
What are the steps to construct a weather station for educational purposes?
To construct a weather station for educational purposes, start with a plan that outlines the sensors and readings you wish to collect, assemble or purchase educational kits that are simple to construct, and involve your students in the building and monitoring process to enhance their learning experience.
What is the simplest weather instrument that can be made at home, and how is it constructed?
The simplest weather instrument you can make at home is a rain gauge. It can be constructed from a large measuring cylinder marked with units of measure, placed in an open area to collect and measure precipitation.
Can you explain how to set up a weather station suitable for children?
To set up a weather station suitable for children, opt for robust and simple-to-use instruments. Ensure the display is easily readable, and involve children in both the setup and the tracking of weather data to foster engagement and learning.
How can I integrate Arduino into the making of a homemade weather station?
Integrating an Arduino into your homemade weather station involves selecting compatible sensors for weather variables, connecting them to the Arduino board, and programming the board to read and possibly transmit the sensor data for analysis and recording.