Looking to add a splash of color to your garden or home decor?
Dyeing rocks with food coloring is a fun, easy, and inexpensive way to brighten up your space. With just a few simple supplies and some creativity, you can transform plain rocks into vibrant works of art.
Whether you’re crafting with kids or looking to create unique centerpieces, the process is straightforward and the results are stunning.
Ready to learn how? Let’s dive into the world of rock dyeing and unleash your inner artist.
To dye rocks with food coloring, select smooth, light-colored rocks. Clean and dry them, then apply a mix of food coloring and water. Once dry, seal with acrylic sealer. Display indoors or in shade to prevent fading, creating vibrant accents for home or garden decor.
Choosing the Right Rocks
Selecting the right rocks is just as important as the dyeing technique itself. When you start your rock-hunting journey, aim for smooth-surfaced rocks. These provide the best canvas for your food coloring, allowing the colors to adhere evenly and showcase their vibrancy. Porous rocks with a more absorbent surface can create interesting, natural patterns but might result in muted colors.
Look for rocks that fit the scale of your project. If you’re creating a garden path, larger rocks will make a bold statement. Smaller pebbles might be perfect for filling a glass vase or scattering around candles for a pop of color in your decor. Always consider the rock’s size when planning how you’ll use your colored rocks in your home or garden.
Natural river rocks are an excellent choice due to their smoothness and round shapes. You can find these at craft stores, landscaping suppliers, or even during a walk along a river or stream. However, if you’re short on time or access, purchasing a bag of rocks from a home improvement store works just as well.
Preparation is key. Before dyeing, make sure to wash the rocks thoroughly with soap and water to remove any dirt or debris that could interfere with the dyeing process. Let them dry completely before starting your project to ensure that the food coloring binds well to the rock surfaces.
In terms of color adherence, light-colored rocks are preferable. They’ll display the food coloring with greater clarity, allowing for more vivid hues. Dark rocks can still be dyed, but the colors might not stand out as prominently.
Experiment with different shapes and textures to find which ones yield the best results. Remember, it’s all about personal preference and the unique look you’re aiming to achieve. After all, the beauty of dyeing rocks with food coloring lies in the endless possibilities for creativity.
Preparing the Rocks
Once you’ve selected the right rocks for your project, the next step is to prepare them for dyeing. Proper preparation will ensure the food coloring adheres well and results in vibrant hues that last.
Firstly, gather your rocks and inspect them for any dirt or debris. Cleaning is vital, as dust and grit could prevent the dye from sticking evenly on the rock surfaces. You’ll want to scrub each rock thoroughly under running water using a brush with firm bristles. Avoid using any harsh chemicals that might create an unwanted reaction with the food coloring.
After cleaning, soak the rocks in warm water for about 15-20 minutes. This soaking period helps to remove any remaining impurities and can also open up pores in the rocks, allowing for better dye absorption. Make sure to rinse the rocks once more after soaking to get rid of any loosened particles.
It’s time to dry your rocks completely. Pat them down with a towel and then lay them out on a flat surface. It’s best to let them air dry because residual moisture could dilute the dye, leading to lighter colors or an uneven application. The drying process may take several hours; the rocks need to be bone-dry before you proceed to the next step.
Once your rocks are dry, assess their natural color one last time. If you’re using light-colored rocks, you’re good to go. If you’re working with darker stones, consider applying a white primer or paint as a base coat to make the colors pop. Let any paint dry fully before moving on to the dyeing process.
Remember, taking your time during the preparation phase is crucial for achieving the best possible outcome when dyeing your rocks. Patience pays off in the vibrancy and longevity of your colorful creations.
Mixing the Dye Solution
Once your rocks are primed and ready, it’s time to focus on creating the perfect dye solution. Start by selecting food coloring that’s vibrant and concentrated for dramatic results. Your choice of colors is key—opt for colors that pop or complement each other if you’re planning a multi-hued design.
For each color you’ve chosen, you’ll need a separate container. Small glass or plastic cups work excellently for this purpose—they’re easy to fill and nimble for pouring. Fill each cup with about a half cup of warm water—the warmth helps to dissolve the food coloring more effectively. Stir in the food coloring, adding drops until you reach the desired intensity. Here’s a basic guideline to follow:
- For pastel shades: 5-10 drops per half cup of water
- For vibrant hues: 15-20 drops per half cup of water
- For deep, rich colors: 25+ drops per half cup of water
Don’t hesitate to experiment with color combinations; mixing primary colors like red, blue, and yellow can yield a beautiful spectrum of secondary shades. Always stir the solution thoroughly to ensure the dye distributes evenly.
If you’re engaging in longer or more complex dyeing projects, consider adding a tablespoon of white vinegar to each dye solution. The acid in the vinegar helps the food coloring adhere better to the rocks, resulting in a more lasting finish.
Keep in mind that the final color might look different once dry, so it’s wise to test your solution on a piece of paper or a spare rock before starting on your main project. This way, you can adjust your dye concoction as needed without compromising the outcome on your beautifully prepped stones.
Remember to wear gloves during this process to prevent staining your hands, and cover your work surface with newspaper or a plastic sheet to catch any drips or spills. With your dye solutions ready, you’re just a step away from transforming plain rocks into vibrant, colorful works of art.
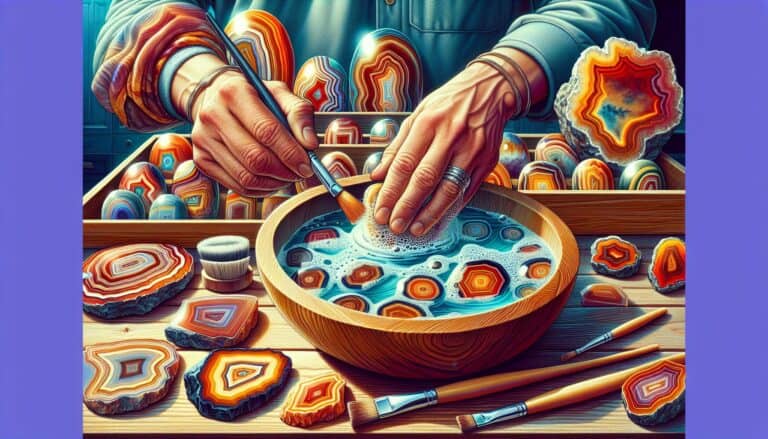
Applying the Dye
Once you’ve prepped your dye solution to the perfect hue, it’s time to move on to the exciting part—applying the dye to your rocks. Proper application is key to achieving a smooth, vibrant finish that’ll make your stones stand out.
Start by laying out the rocks you plan to dye on a protected work surface. A plastic sheet or old newspapers work great for this. Dip a sponge or brush into your dye solution, and evenly coat the surface of the rock. You can apply one solid color or go wild with patterns and designs.
Here’s a quick rundown on application techniques:
- Dip-Dye Method: Submerge the rock directly into the dye solution for a solid, all-around color.
- Paint-On Method: Use a paintbrush to apply the dye for more intricate designs or if you’re using multiple colors on one rock.
- Spray Method: Put the dye in a spray bottle for a speckled, airbrushed look—remember to spray from a distance to avoid over-saturation.
As you’re working, make sure to frequently stir the solution to prevent the color from settling at the bottom. Rotate the rocks gently to cover any missed spots and to ensure even coverage all around.
Depending on how saturated you want the color to be, you can apply multiple layers of dye. Just allow the first layer to dry slightly before adding another. This prevents the colors from bleeding into each other, giving you crisp and distinct lines, especially if you’re layering different colors.
It’s also worth noting that the longer you let the rocks sit in the dye, the deeper the color will penetrate. Experiment with letting some rocks soak for longer periods if you’re aiming for darker hues. On the contrary, for lighter tones, a quick dip might be sufficient.
Remember, dyeing rocks is not an exact science; it’s an art. There’s room for creativity and personal flair, so don’t hesitate to try various techniques until you find the one that works best for you. Keep some paper towels handy to dab off excess dye or to correct any mistakes as you go.
Drying and Sealing the Rocks
Once you’ve achieved the desired depth of color on your rocks, it’s crucial to dry them properly. Lay out the dyed rocks on a sheet of newspaper or a wire rack, making sure they’re not touching each other to prevent colors from bleeding. Air drying is the best method as it allows for an even drying process; this can take anywhere from a few hours to overnight, depending on the size of the rocks and the humidity in your environment.
To speed up drying, you can place the rocks in an area with good air circulation or use a fan. However, avoid using heat sources like hair dryers or ovens as these can cause uneven drying and may affect the final color.
After your rocks are completely dry to the touch, it’s time to seal them. Sealing is an important step that preserves the vibrant colors of the dye and protects the rocks from moisture and fading. For sealing, you have several options:
- Acrylic sealer: Available in spray and brush-on forms, it provides a durable and usually glossy finish.
- Mod Podge: Acts as a sealer, glue, and finish. It’s great for adding a slightly textured, matte finish.
- Clear nail polish: An easy-to-use option for small rocks, giving a glossy, protective layer.
Apply the sealer according to the product’s instructions. Most sealers require applying multiple thin coats rather than one thick one, ensuring each layer is dry before adding the next. Always work in a well-ventilated area when using sealants to avoid inhaling fumes.
Sealants not only protect your dyed rocks but also can enhance the overall appearance, making the colors pop and adding a professional finish. Remember, patience is key during the drying and sealing process to ensure the best outcome for your colorful creations. Keep experimenting with different sealants to find the one that best suits your project.
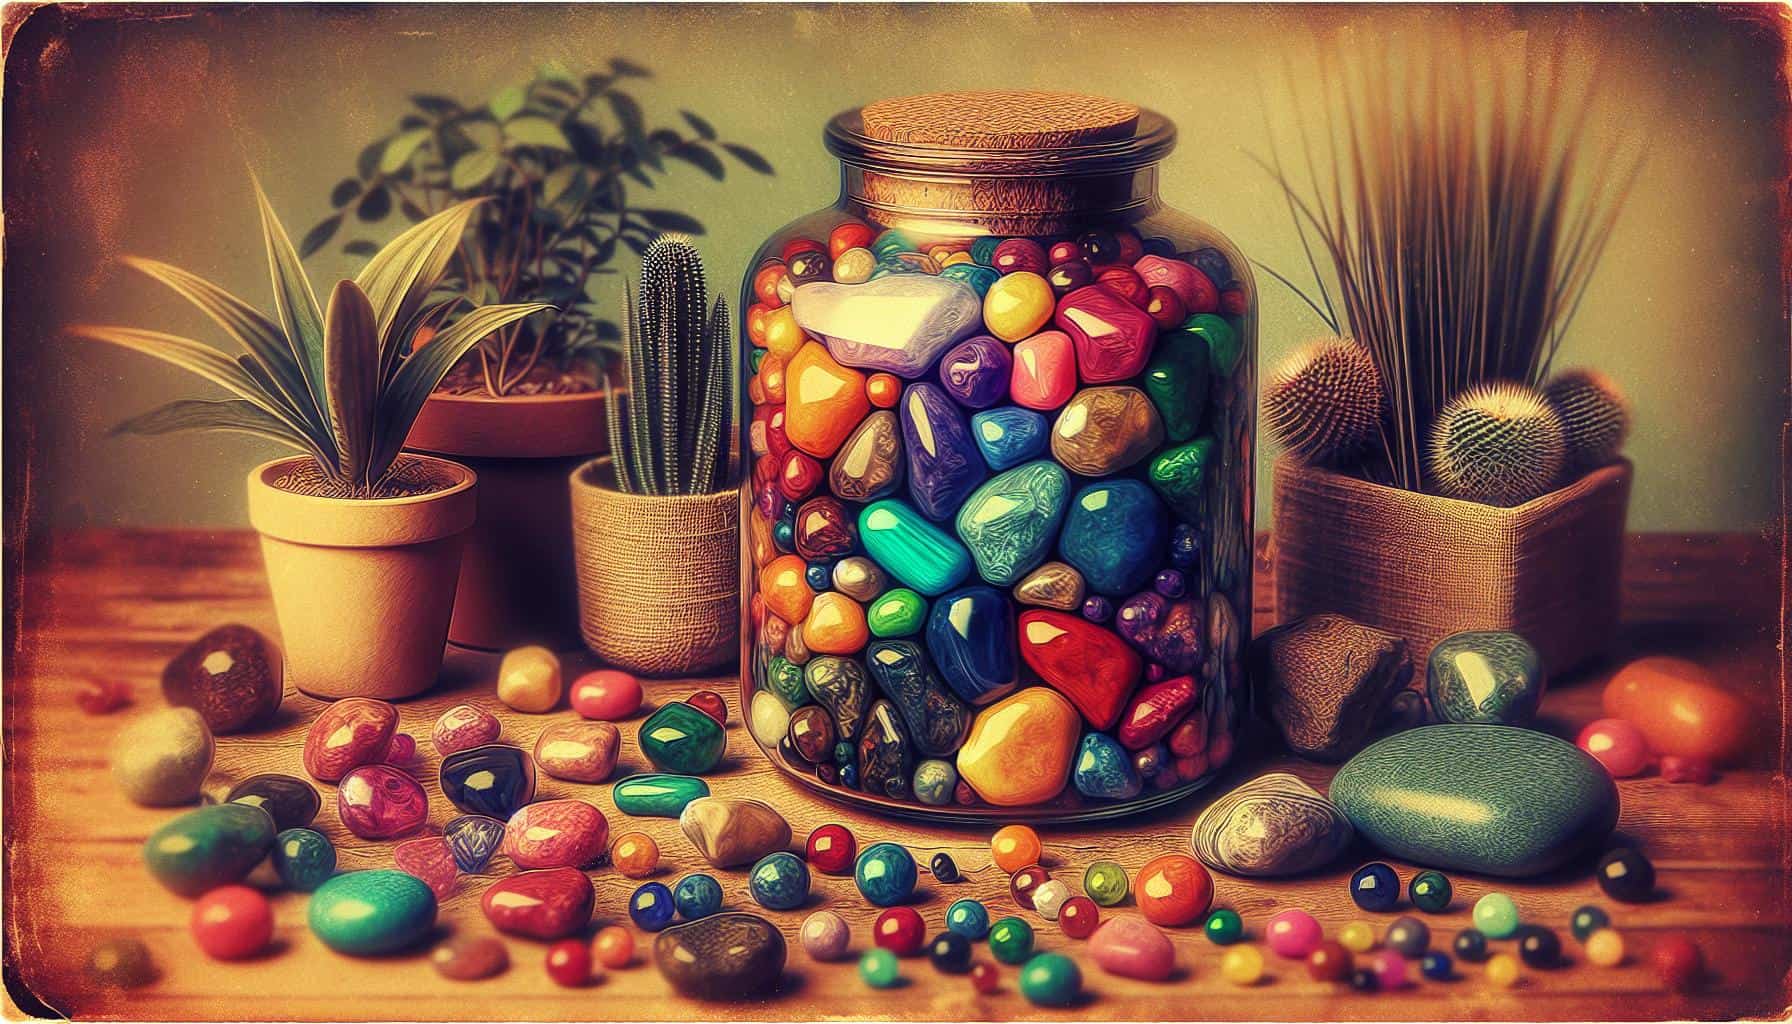
Displaying and Caring for Dyed Rocks
Once your rocks are dyed, dried, and sealed, you’re ready to showcase them. Display options are as varied as your creativity, allowing you to add a personal touch to your home or garden. Consider arranging your colored rocks in glass jars or scattering them among potted plants. Not only do they make eye-catching centerpieces, but dyed rocks can also serve as conversation pieces when strategically placed in your landscape.
Light Exposure: Be mindful of where you display your dyed rocks. Intense sunlight can cause colors to fade over time. To maintain the vibrancy of your rocks, place them in areas where they are shielded from direct sunlight.
Cleaning Tips: Your dyed rocks will need cleaning occasionally to keep them looking their best. A soft, damp cloth is usually sufficient to wipe away dust or dirt. For stubborn spots, a mild soap solution can be used. Then, rinse the rocks with water and let them air dry or gently towel dry to prevent any water spots.
Periodic Sealing: Over time, the sealer may wear off, especially if the rocks are handled frequently or kept outdoors. It’s important to reapply a sealer periodically to protect the color. Performing this maintenance can extend the life of your rocks’ beautiful hues.
For outdoor displays, it’s essential to reseal the rocks before winter to protect them from moisture and freezing temperatures that could cause the colors to crack or peel. Make it a part of your seasonal prep routine.
Engage in rotating your display or creating new color schemes for different occasions. Seasonal themes, holidays, or simply mixing up colors to match your current decor can refresh your space and provide an outlet for continuous creativity with your colorful stones.
Remember, each rock is unique and so too will be your approach to displaying and caring for them. Armed with these care tips, your dyed rocks are set to brighten your space for years to come.
Conclusion How to Dye Rocks
Dyeing rocks with food coloring is a creative and fun way to add a pop of color to your space.
By following the steps you’ve learned, you’ll have vibrant, eye-catching stones that reflect your personal style. Remember to care for your dyed rocks properly, so they continue to beautify your home or garden. Whether you’re refreshing your display for a seasonal touch or maintaining the brilliance of your rocks, each piece is a testament to your creativity.
Now go ahead, let your dyed rocks be the conversation starters they’re meant to be!